Friday, December 31, 2010
NGC3324
Thursday, December 30, 2010
FocusMax Settings
I now have my V-curves in FocusMax and want to enable the focus convergence. To do that I need to work out Critical Focus Zone (CFZ) and translate that into focuser steps.
CFZ for a scope can be worked out with this fomula:
CFZ(in Microns) = 2.2 x (Scope_Focal_Ratio²)
My RC8 having a focal ratio of 8 gives me a CFZ of 140.8 microns.
That sounds tiny in everyday speak, good thing that I have an awsome high resolution stepper motor focuser.
According to Moonlite focuser manual, 1" travel of the drawtube requires 6135 full steps, wow! that's a lot of tiny steps, 1 micron = 4 steps to be exact.
This leaves me with CFZ = 35.2 steps
So, for the step width in focus convergence setting, I want to set it with approximately 1/10th to 1/4th of the CFZ step value say 5 steps.
Now to set the various Half Flux Diameter (HFD) values, I'll need to look at my V-curve log.
The smallest value on the linear parts of the v-curve before it reaches focus seems to be about 6. Increasing this value by 1/4 gives me 7.5(8) to set as Near Focus HFD. This value can be increased by a 1/3 to set as Focus Start HFD, which is 10. The smallest value on the plot is 4.2, increase this value by 1/2 to set as Focus Routine Max HFD, which is 6.3.
Labels:
CFZ,
focus convergence,
FocusMax,
Moonlite Focuser
NGC6188
QHY9 Shutter Silencer
 |
| Factory installed plastic stop |
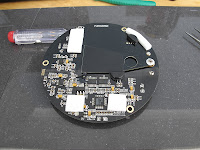
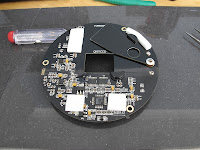
On my list of things to do is silencing QHY9's shutter noise. As the shutter moves from open to closed position, it hits hard against a jumper used as a stop. When going from closed to open position, it comes to a sudden stop on the side of the camera's metal casing. This whipping of the shutter back and forth creates a fairly loud tick-tock noise amplified by the resonating case. It's quite loud enough to make me worry about bothering the neighbours late at night, especially when I'm firing off 40 continous shots with Focusmax.
 After taking a look at the shutter assembly , I came up with a rather simple solution. A small self-adhesive rubber feet cut in half placed carefully at the shutter travel limits. Well, not quite at the shutter travel limits, but may be half a millimeter before the original stops. Just enough to take the edge out of the shutter impacting the orginal stops. If you wanted to eliminate the noise all together then just place it further in, too easy. Things to note though, must allow the shutter to fully cover the sensor when closed and clear the sensor when open. Also, I prefer some noise to indicate that it is working. Checkout the photos to see what I mean.
 Wednesday, December 29, 2010
CCDrift - My little drift alignment program
An application wrote by me, for me. Never thought I would actually write a program that's actually useful in real life, otherwise I would have paid more attention during those uni days.
This was written to automate the mount drift and camera exposure required to do a 'CCD drift polar alignment', a modern adaptation of polar alignment with photographic plate. A good explaination of the priciple behind it can be found here and here.
There are many polar alignment softwares out there such as PoleAlignMax(free but note J2000 issue), EQAlign(free), PEMPro and WCS, but out of all, I feel most comfortable using the CCD drift method. It's probably because the alignment result and procedure is quite 'visual' to comprehend and straight forward to execute, Ol' Skool. The downside is that you had to manually set the tracking rate and hold the East or West slew button down for the duration of the drift, that's where my little app comes in.
Initially, I wrote the the whole drift and exposure procedure in VBscript. It didn't take long to realize that the 'sleep' call I was using as the timer was not accurate and hogging a lot of resources. Converting it to VB forms did make it much more efficient to operate and also looks prettier.
On the right is the little helper window showing me which way to make the correction on the mount after looking at the star trails. It is customised to match the orientation of my CCD camera ie. up and down is the Right Ascension (RA) axis.
At the moment the application directly interfaces to EQMOD and Maxim DL. If the demand is out there I may convert it to use more open ASCOM interfaces and make it available to the public domain.
See below for my drift example.
See below for my drift example.
 |
| 10Minute drift before correction |
 |
| After correction |
Labels:
ccd drift,
drift alignment,
eqalign,
pempro,
polalignmax,
polar alignment,
wcs
Periodic Error
Here's Periodic Error (PE) analysis of my EQ6. To generate this graph, I've captured 6 worm cycles (6x 8mins) of drift using PERECORDER. This was then imported into PECPrep for analysis and to create PE correction (PEC) file for EQMOD ASCOM driver.
The anlaysis shows my mount has 21 arcsecs peak to peak error. Pretty typical of these mounts, but still shocking!
I've yet to do a proper analysis of the mount with PEC applied. I've never needed to with autoguiding, but I think it's time to give it a go next time under the stars.
Labels:
EQ6,
PE,
PEC,
PECPrep,
PERECORDER,
Periodic error
AstroDreamTech Mounts
| Morning Calm 500GE |
| Morning Calm 700GE |
| Morning Calm 300GE |
While researching for replacement mount options, I came across Korean made mounts. AstroDreamTech's
Morning Calm mounts' specification/price/finishing seems to be on par with Astrophysics mounts, on paper anyway.
As far as I can tell with my limited Korean reading skill, AstroDreamTech is a new comer in the mount manufacturing scene with low volume production. So it may be sometime before it makes it out into exports, if they ever decide to do so. Anyhow, it will stay on my list of mounts and hopefully get to see one in the flesh on my next trip to Korea.
Images courtesy of AstroDreamTech
Labels:
300GE,
500GE,
700GE,
AstroDreamTech,
Equaltorial mount,
Korean
My Imaging Rig
My current imaging setup: EQ6 mount with EQDIR, GSO RC8, QHY9, QHY Filterwheel, Orion Starshoot Guider, Moonlite Focuser.
I'm hoping to replace the mount in 2011. An Astrophysics mount would be nice.
I'm also working on converting my 9x50 finder scope into a guiderscope, which will replace the white refractor sitting on top. At the same time I should be able to run with one less counterweight.
I'm also working on converting my 9x50 finder scope into a guiderscope, which will replace the white refractor sitting on top. At the same time I should be able to run with one less counterweight.
Labels:
Astrotech,
AT8RC,
EQ6,
EQDIR,
GSO,
Moonlite Focuser,
Orion Starshoot guider,
QHY9,
RC8
Tuesday, December 28, 2010
Imaging run screenshot
Just playing around with windows arrangement in preparation for an imaging run. This laptop has high resolution wide screen which is put to good use here. When I build my permanent observatory, I think a triple screen setup is a must.
Moonlite Focuser
Here's the new Moonlite focuser installed on the RC8 with QHY9 and filterwheel hanging off it. I promised to Michelle that this will be the last astro stuff I'll be purchasing 'this' year. Hahahah... Happy New Year!
Just over $720(Awsome exchange rate!!!) landed in Australia, it comes with stepper drive and a USB controller. The flange is manually rotatable and collimatable. Most importantly it shows no sign of flex what so ever.
1st night out I used Bahtinov mask and jog function to reach focus. 2nd night out I fired up Focusmax and followed instructions to run v-curves.
Screen capture shows my initial v-curve runs. To my surprise everything just worked as it automatically stepped through exposures and focuser positions OMG!
There are many parameters to adjust to suit my system, so will need to hit the forums to work out my critical focus zone (CFZ), step size etc..
NGC2070
 I've done very little imaging since acquiring the new CCD camera and RC8. Have been very busy doing up my backyard, it's no longer a weed infested, dusty sandpit. At least, I now feel more comfortable taking my imaging gear out onto the limestone pavement instead of the sand.
 I've put all the gear back together with some new additions like the shiny new moonlite focuser!! and as usual it took me few weeks to re-climb the learning curve of astrophotography.
 The NGC2070 is about 3 hours worth of Hydrogen Alpha in 20 minute subs. Most subs thrown out due to guiding and focus issues. I still need few more nights under the stars to sort things out.
Subscribe to:
Comments (Atom)


